
如何在 Macnica Sulfur Agilex 5 開發套件中構建 Boot Loader、Linux Kernel 和 SD 卡

介紹
提供Mpression Sulfur Type-A開發套件建構Boot Loader/Linux Kernel/SD Card的說明。本文說明基於以下連結的操作過程。
環境
- Mpression Sulfur Type-A
- Quartus® Prime Pro 22.3
- Ubuntu 22.04 LTS
注意
- 下載並使用Sulfur原始程式碼。
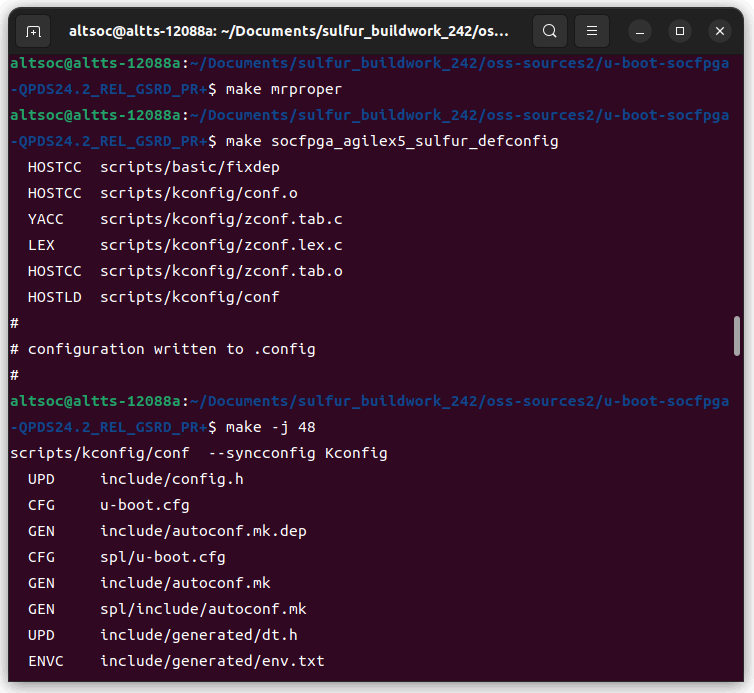
- U-Boot配置使用專用defconfig(socfpga_agilex5_sulfur_defconfig)。
- Linux device tree是從專用設備樹 socfpga_agilex5_sulfur.dts 產生的。
- U-Boot 和 Linux 內核構建過程必須在 Linux 作業系統環境下進行。
- 本文檔中的過程已在Ubuntu 22.04 LTS上得到驗證。
1.Compiler tool chain 設定
1-1 下載並解壓縮toolchain
wget https://developer.arm.com/-/media/Files/downloads/gnu/11.2-2022.02/binrel/gcc-arm-11.2-2022.02-x86_64-aarch64-none-linux-gnu. tar.xz |
1-2 設置環境變數
| export PATH=`pwd`/gcc-arm-11.2-2022.02-x86_64-aarch64-none-linux-gnu/bin:$PATH export ARCH=arm64 export CROSS_COMPILE=aarch64-none-linux-gnu- |
1-3 安裝其他必要套件
| sudo apt install build-essential bison flex ncurses-dev swig libssl-dev |
注意:若使用Ubuntu以外的OS,則命令以及所需的軟體包可能有所不同。
2.如何獲得Source Tree
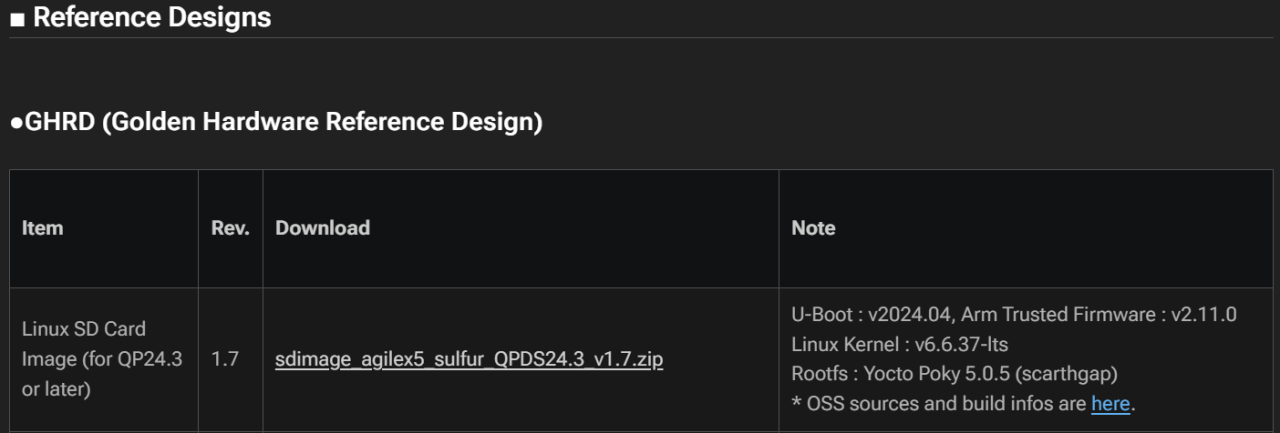
下載內容如下
File name (xxx is variable) | Summary |
|---|---|
README.EN / README.JP | Text of the original source tree location information and build instructions |
arm-trusted-firmware-xxx.tgz | Arm Trusted Firmware (ATF) source tree |
u-boot-socfpga-xxx.tgz | Source tree of U-Boot |
linux-socfpga-xxx.tgz | Linux kernel/driver source tree |
poky-build-xxx.tgz | Archive of configuration and recipes for RootFS (Yocto Poky) build |
poky-socfpga-sources-xxx.tgz | Archive of OSS source tree included in RootFS (*1) |
(*1) Because the file size is large, you may need to download it separately. (See README)
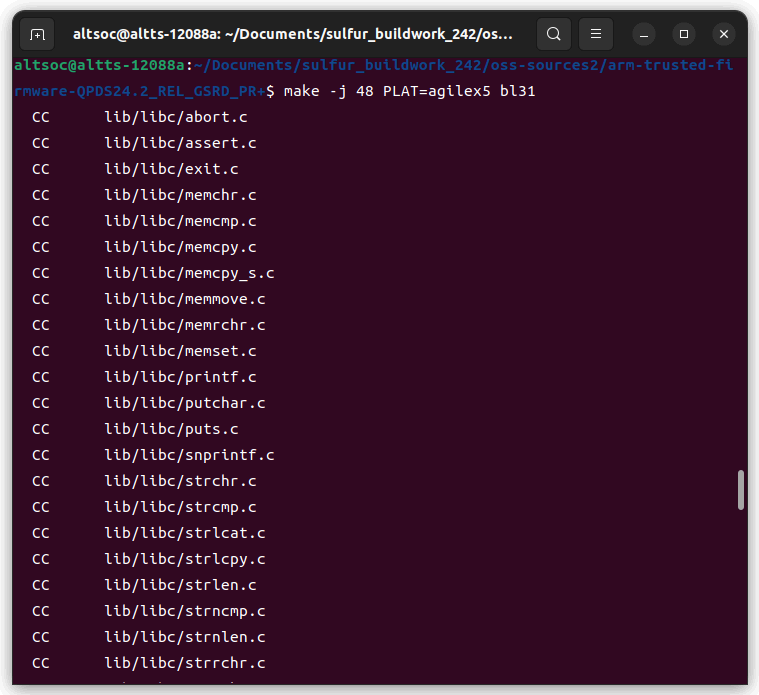
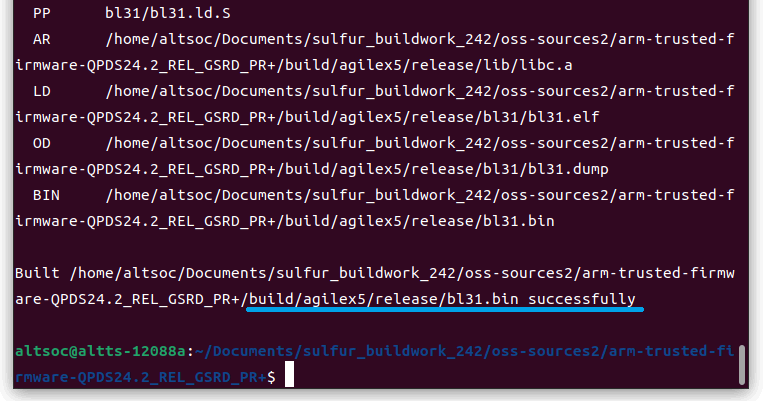
3.建立Arm Trusted Firmware (ATF)
| export PATH=`pwd`/gcc-arm-11.2-2022.02-x86_64-aarch64-none-linux-gnu/bin:$PATH export ARCH=arm64 export CROSS_COMPILE=aarch64-none-linux-gnu- |
建構ATF
| make -j 48 PLAT=agilex5 bl31 |
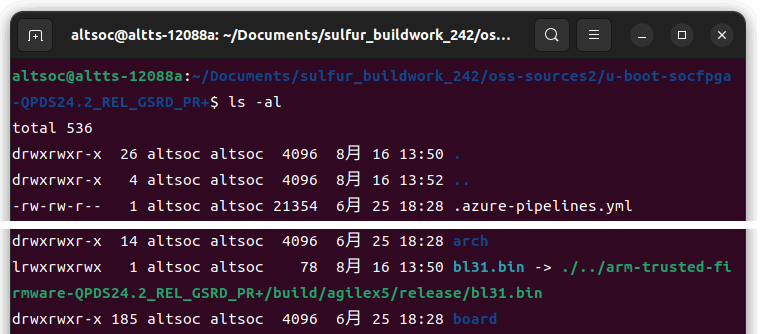
4.建構SSBL(U-Boot)和FSBL(U-Boot SPL)
| tar xf u-boot-socfpga-xxx.tgz cd u-boot-socfpga-xxx |
將之前建構的ATF(bl31.bin)連結至U-Boot Source tree
| ln -s . /arm-trusted-firmware-xxx/build/agilex5/release/bl31.bin . |
設置連結後,須確保使用ls -al命令正確識別目標
| make mrproper make socfpga_agilex5_sulfur_defconfig make -j 48 |
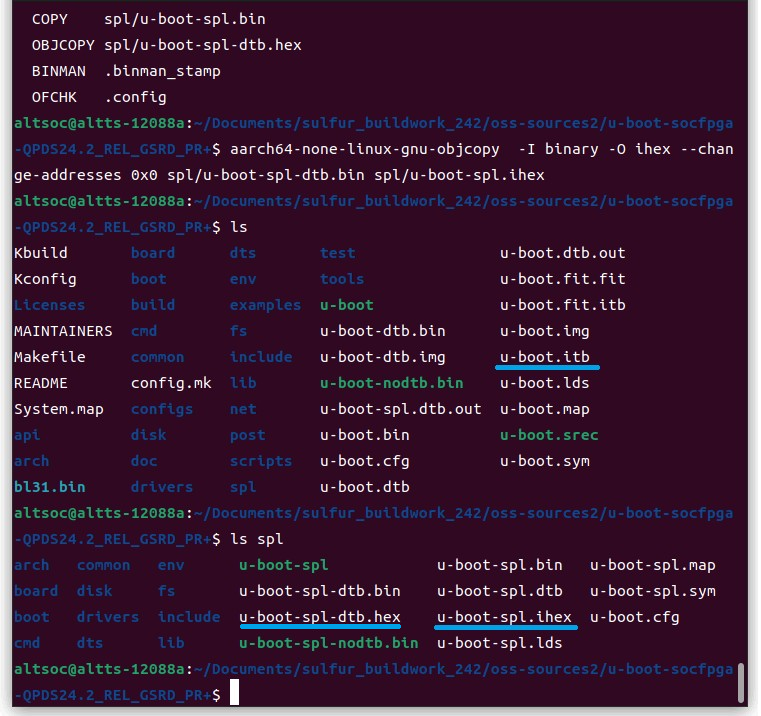
對於FSBL,使用HEX格式檔案,他會在make時自動生成(spl/u-boot-spl-dtb.hex),但也可透過以下命令手動轉換
| aarch64-none-linux-gnu-objcopy -I binary -O ihex --change-addresses 0x0 spl/u-boot-spl-dtb.bin spl/u-boot-spl.ihex |
*注意:自動生成與手動生成是相同的,後者為Quartus 24.2之前設計使用的舊程式
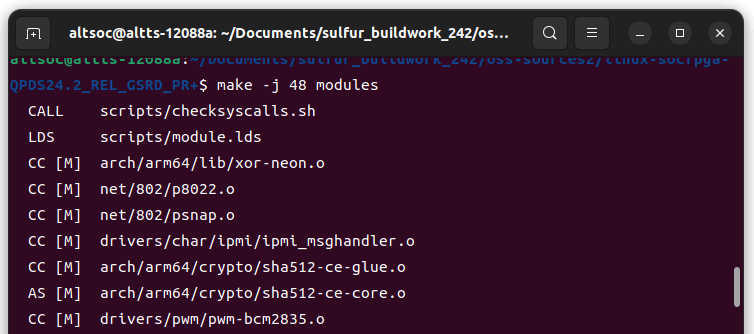
5.建構Linux kernel/driver
| tar xf linux-socfpga-xxx.tgz cd linux-socfpga-xxx |
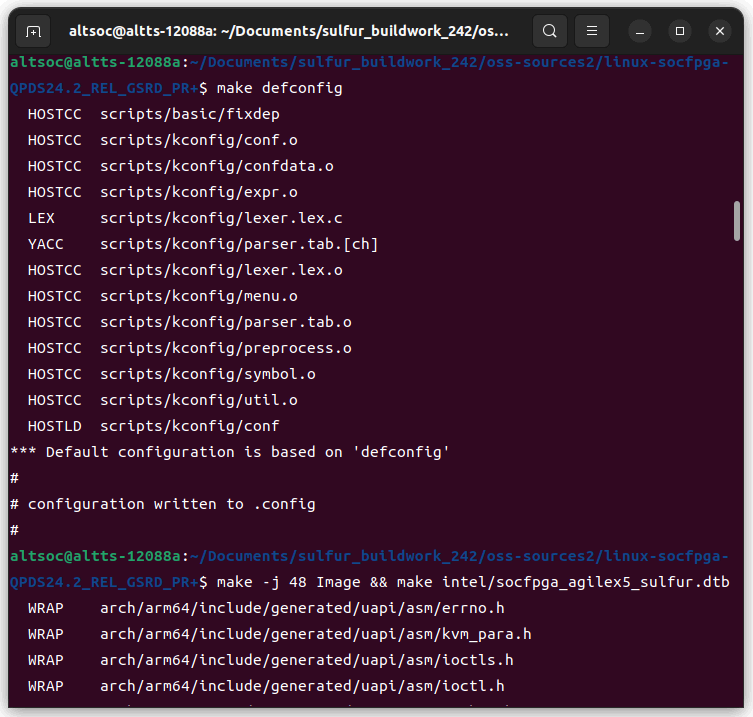
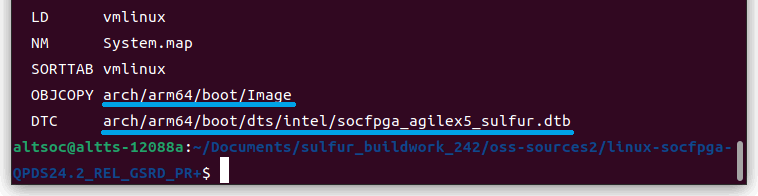
建構Linux kernel/device tree
| make defconfig make -j 48 Image && make intel/socfpga_agilex5_sulfur.dtb |
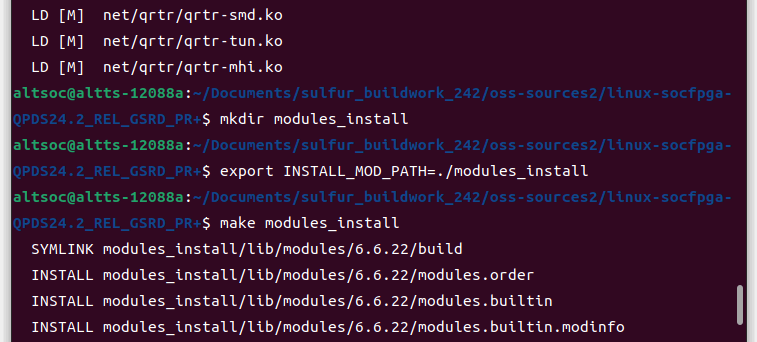
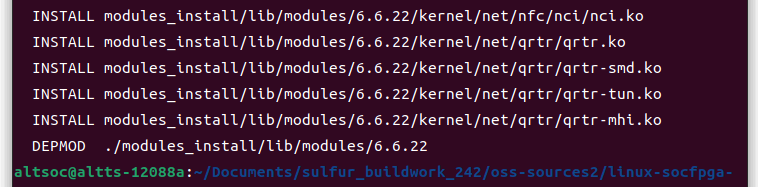
| make -j 48 modules mkdir modules_install export INSTALL_MOD_PATH=./modules_install make modules_install |
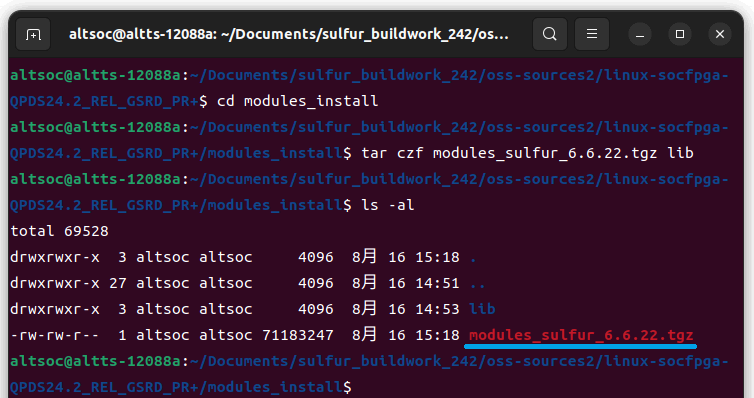
| cd modules_install tar czf modules_sulfur_xxx.tgz lib |
6.建構結果
Deliverables | File name (xxx is optional) | Summary |
|---|---|---|
FSBL | u-boot-spl-dtb.hex or u-boot-spl.ihex | ihex image of U-Boot SPL, used in combination with configuration data to be written to SDM (* see appendix) |
SSBL & ATF | u-boot.itb | .itb file containing the U-Boot and ATF. Stored on the FAT partition of the boot SD card. |
Linux kernel | Image | Linux kernel image. Stored on the FAT partition of the SD card for boot. |
Linux Device Tree | socfpga_agilex5_sulfur.dtb | Linux device tree Blob, stored in the FAT partition of the boot SD card. |
Linux driver Module | modules_sulfur_xxx.tgz | Linux driver module archive. Extracted and used under /lib/modules in the rootfs partition of the boot SD card. |
7.Create SD Card
7-1.SD Card 內容
Outside the SD Card (Stored in QSPI Flash)
● Phase 1 FPGA Image (.jic)
● Phase 1 FPGA Image
● U-Boot SPL Hex/Binary (New)
SD Card: Partition 1
● Linux Kernel Image (Image)
● Phase 2 FPGA Image (ghrd.core.rbf)
● Device Tree Blob (socfpga_agilex_socdk.dtb)
● u-boot.itb
● U-Boot Image
● Trusted Firmware-A (New! Described as ATF in articles on RocketBoards.org)
● Device Tree File
SD Card: Partition 2
● Rootfs Image
7-2.硬體設計
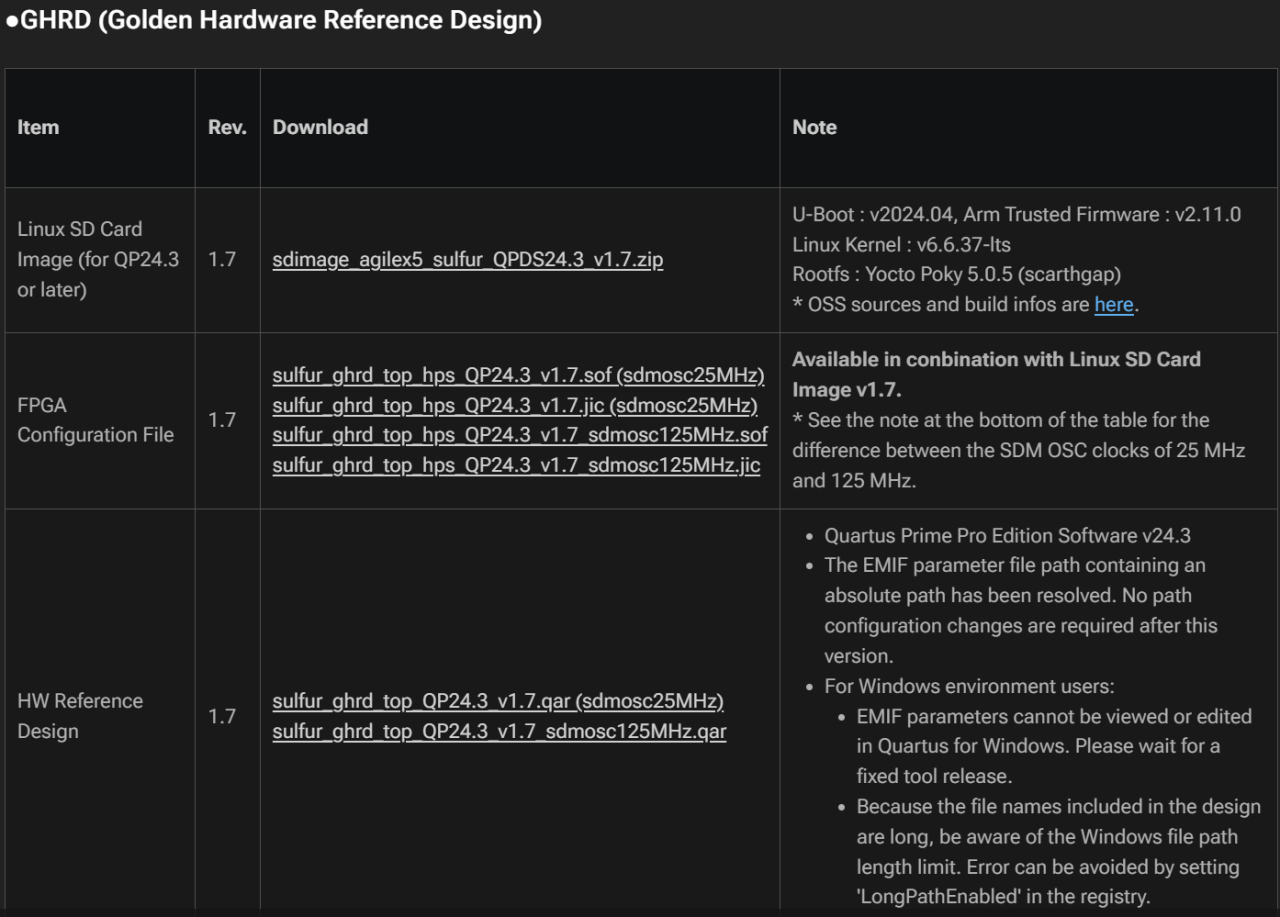
- 下載GHRD Configuration File,包含燒錄檔案以及完整Project
7-3.Rootfs
本文檔使用為Ubuntu 20.04,可至以下連結下載。
| cd $LINUX_BIN/a53 wget https://cdimage.ubuntu.com/ubuntu-base/releases/20.04/release/ubuntu-base-20.04.5-base-arm64.tar.gz |
*檔案位置請根據自己需求放置
7-4.準備SD Card Image
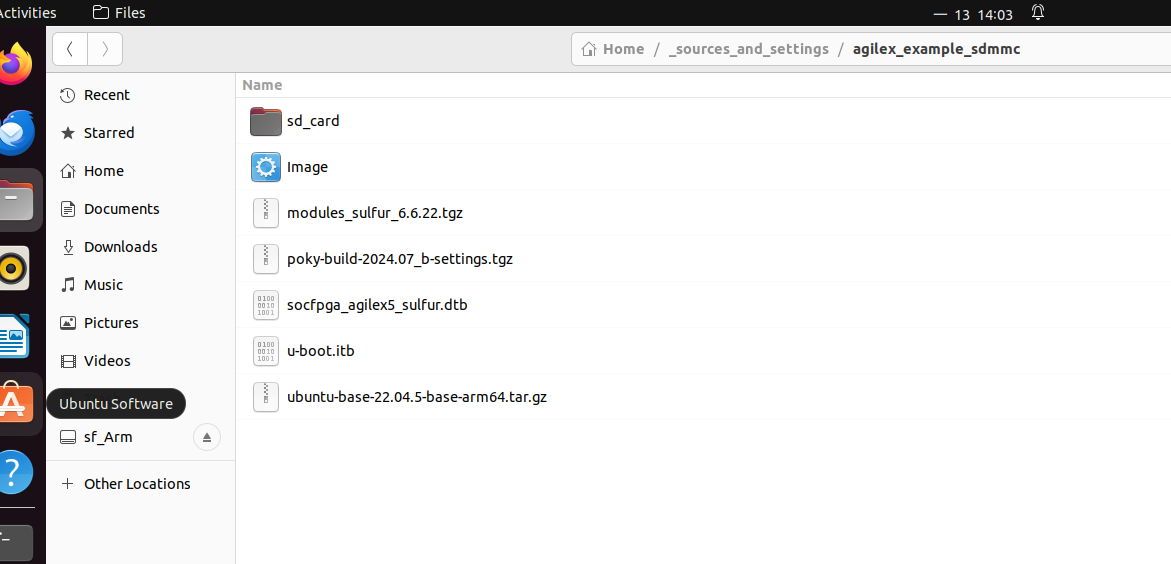
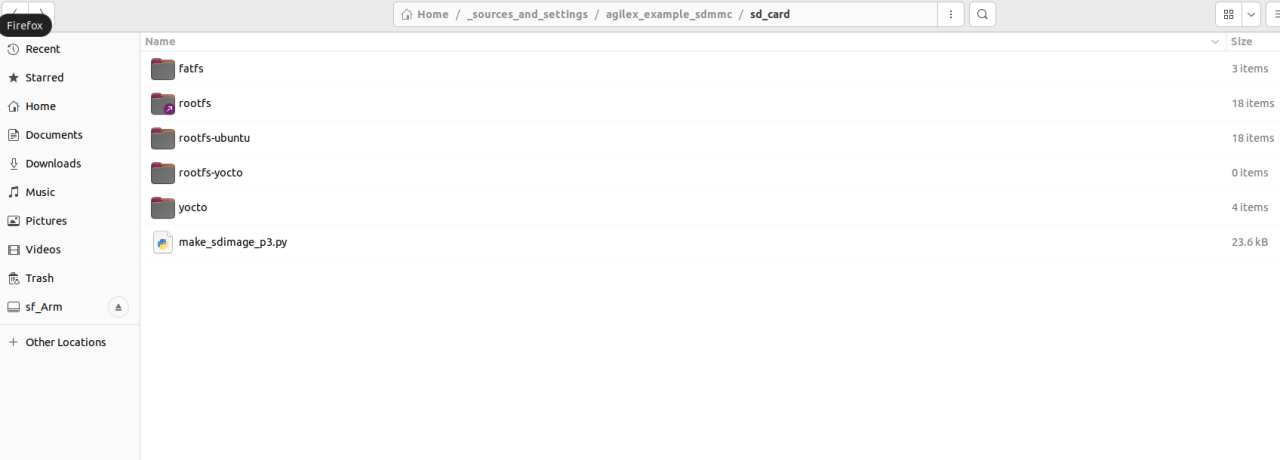
以下請根據自己檔案位置將其複製到同個資料夾。
| cd $TOP_FOLDER sudo rm -rf sd_card && mkdir sd_card && cd sd_card wget https://releases.rocketboards.org/release/2020.11/gsrd/tools/make_sdimage_p3.py chmod +x make_sdimage_p3.py mkdir sdfs && cd sdfs cp $TOP_FOLDER/u-boot-socfpga/u-boot.itb . cp $LINUX_BIN/a53/Image . cp $LINUX_BIN/a53/socfpga_agilex_socdk.dtb . cp $TOP_FOLDER/ghrd.core.rbf . cd .. |
| mkdir rootfs-ubuntu && cd rootfs-ubuntu sudo tar xf $LINUX_BIN/a53/ubuntu-base-20.04.5-base-arm64.tar.gz sudo rm -rf lib/modules/* sudo cp -r $LINUX_BIN/a53/modules/* lib/modules/ cd .. ln -s rootfs-ubuntu rootfs |
| sudo python3 make_sdimage_p3.py -f \ -P sdfs/*,num=1,format=fat32,size=56M \ -P rootfs/*,num=2,format=ext3,size=800M \ -s 856M \ -n sdcard.img cd .. |
7-5. 寫入SD Card
| $ sudo dd if=sdcard.img of=/dev/<your device path> status=progress |
Winodes使用Win32DiskImager

7-6. 自訂SD Card
| $ ls /dev/sd* # Before inserting the SD card sda sda1 sda2 sda3 $ ls /dev/sd* # After inserting the SD card sda sda1 sda2 sda3 sdb sdb1 sdb2 $ mkdir mnt # Create directory for mounting $ sudo mount /dev/sdb2 mnt |
在上面的例子中,sdb 是 SD 卡磁碟。由於 sdb2 對應於文件系統,因此我們將配置這部分。
詳細可以參考以下。
Cyclone® V SoC Linux Construction Procedure: 7. Building the Root File System (rootfs)
| sudo apt install qemu-user-static binfmt-support |
安裝後,複製必要的檔並掛載 chroot 時方便的子目錄。
| sudo cp -b /etc/resolv.conf mnt/etc/resolv.conf sudo cp /usr/bin/qemu-aarch64-static mnt/usr/bin sudo mount -t proc /proc mnt/proc sudo mount -t sysfs /sys mnt/sys sudo mount -o bind /dev mnt/dev sudo mount -o bind /dev/pts mnt/dev/pts sudo chroot mnt |
| chmod 1777 /tmp apt clean && apt update apt install -y vim git parted iproute2 netplan.io iputils-ping network-manager isc-dhcp-client kmod sudo openssh-server systemd |
使用者以及密碼配置
| passwd adduser agilex usermod -aG sudo agilex |
網路配置
| vim /etc/ssh/sshd_config # uncomment PasswordAuthentication yes cat << EOF > /etc/netplan/00-default.yaml network: version: 2 renderer: networkd ethernets: eth0: dhcp4: yes EOF |
完成後,退出並卸載每個目錄。
| exit # Exit chroot sudo umount mnt/proc sudo umount mnt/sys sudo umount mnt/dev/pts sudo umount mnt/dev sudo umount mnt |
8. Boot Up
8-1. 接上Cable並調整SW1
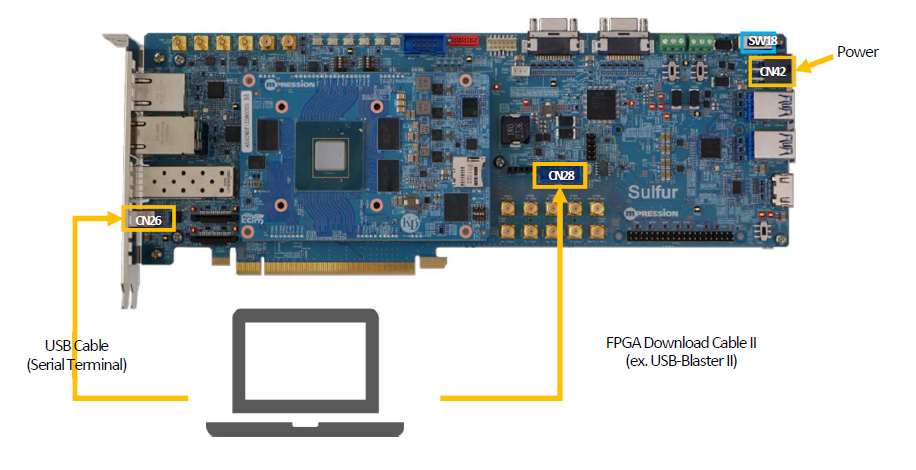

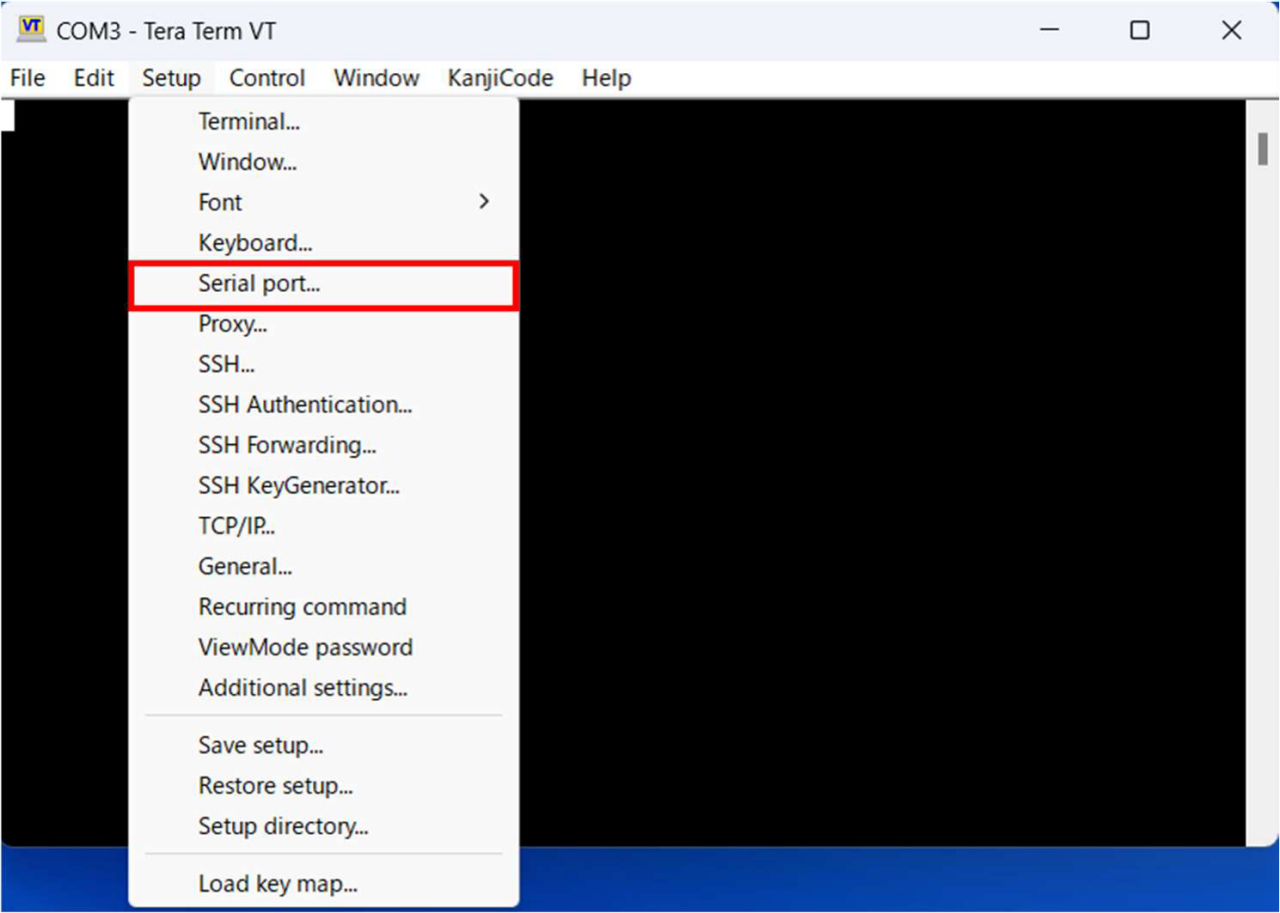
8-2. Prepare serial communication Console
Select setup => Serial port

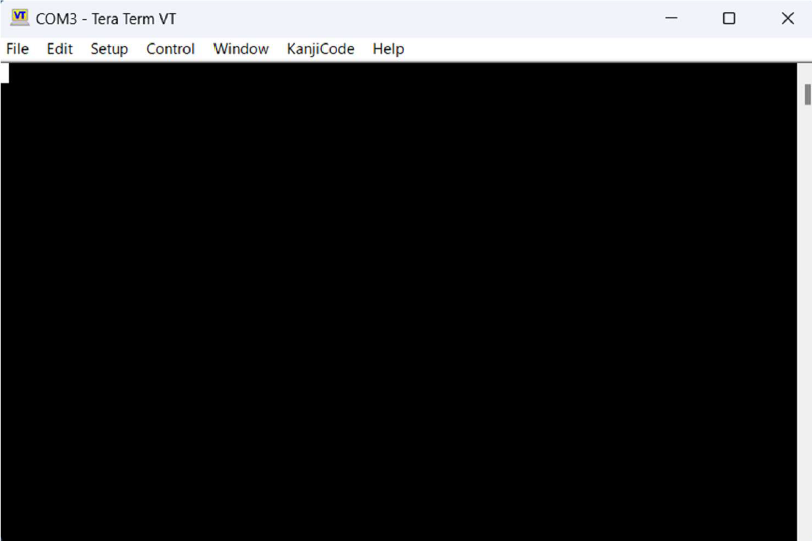
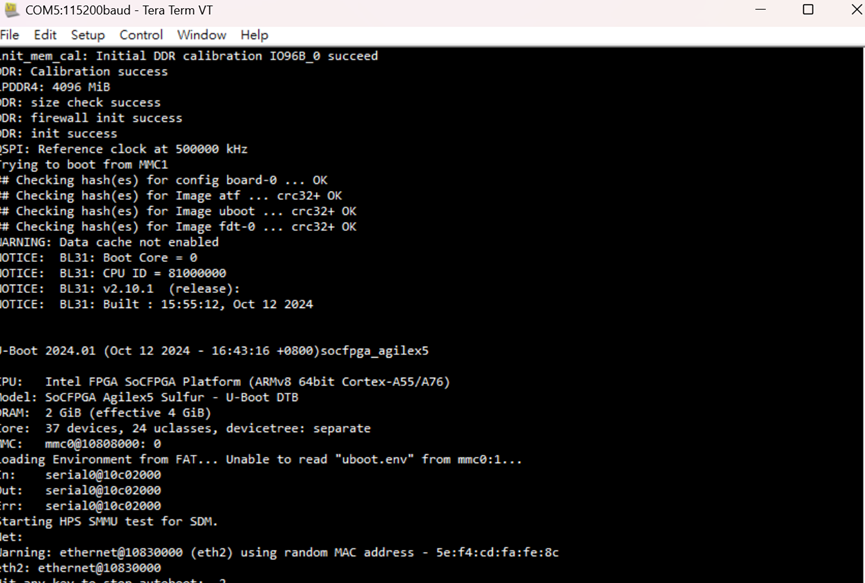
Tera Term Waiting for Boot
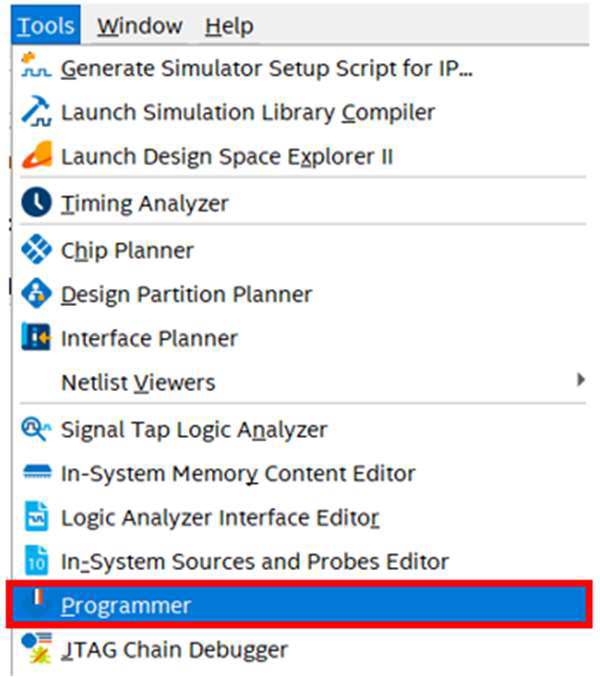
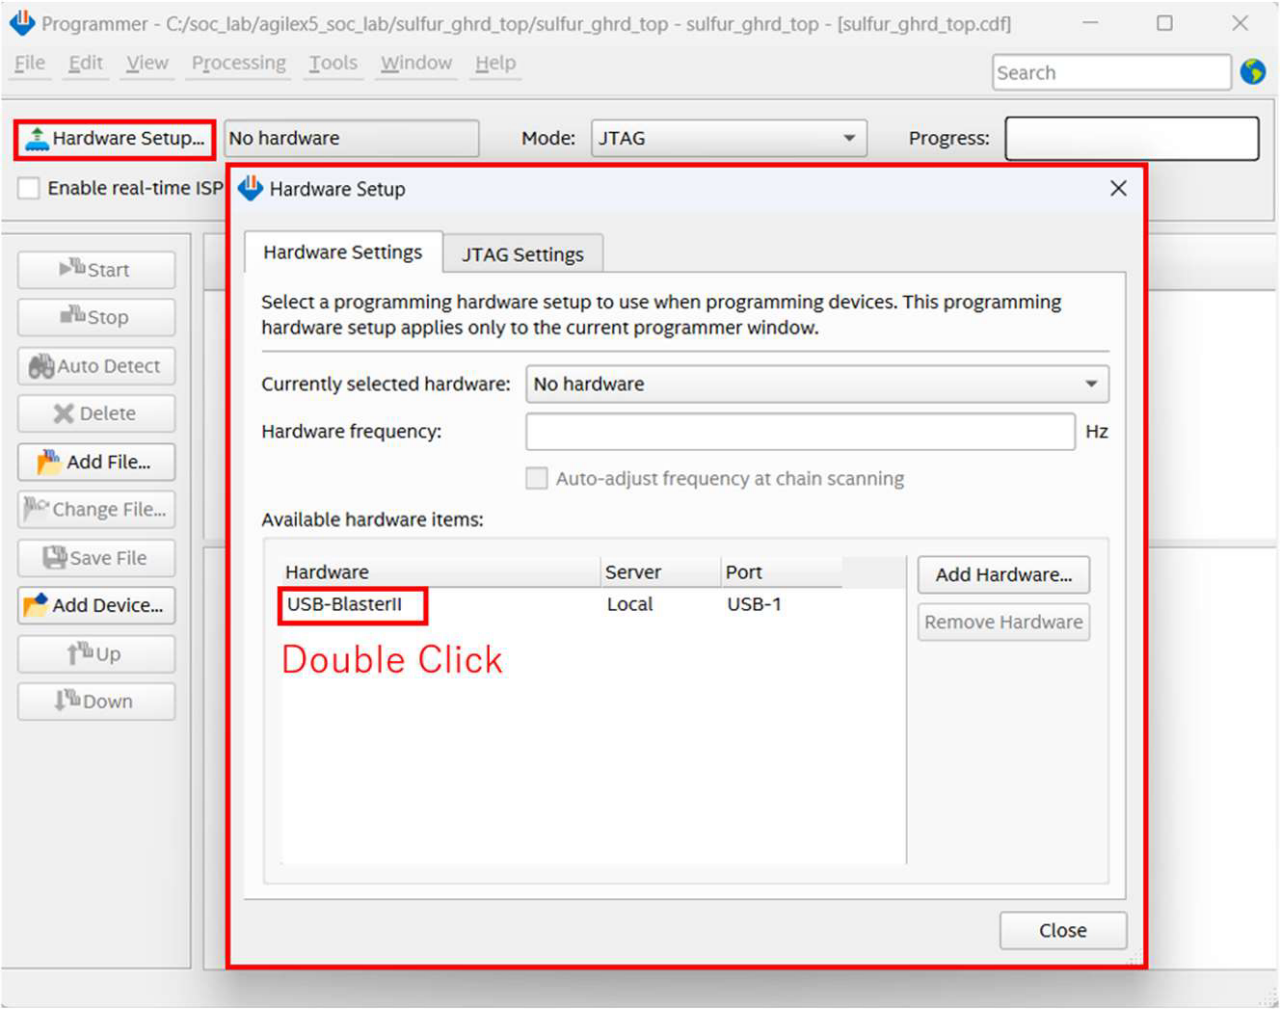
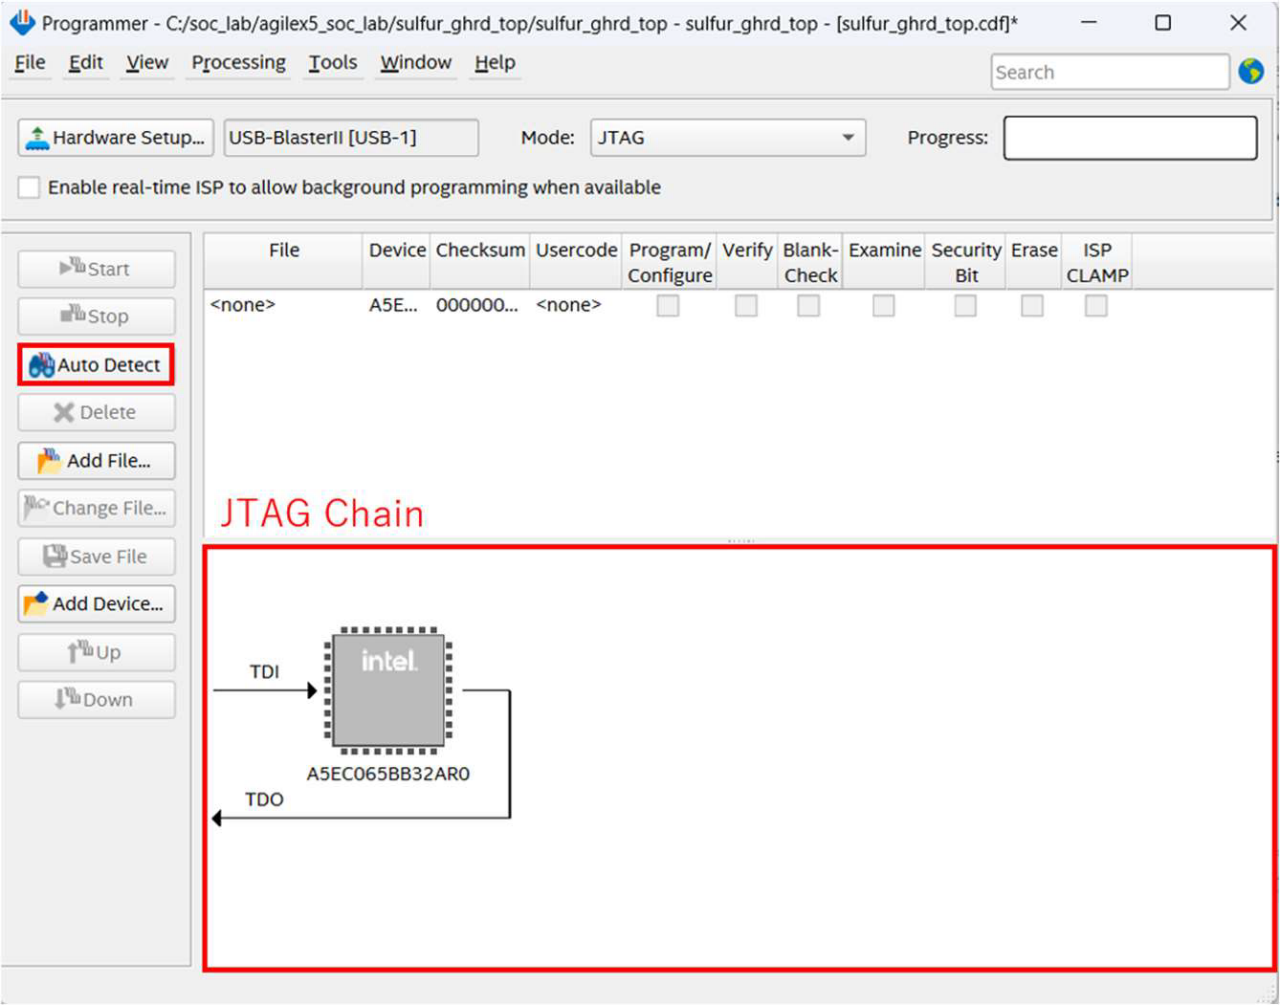
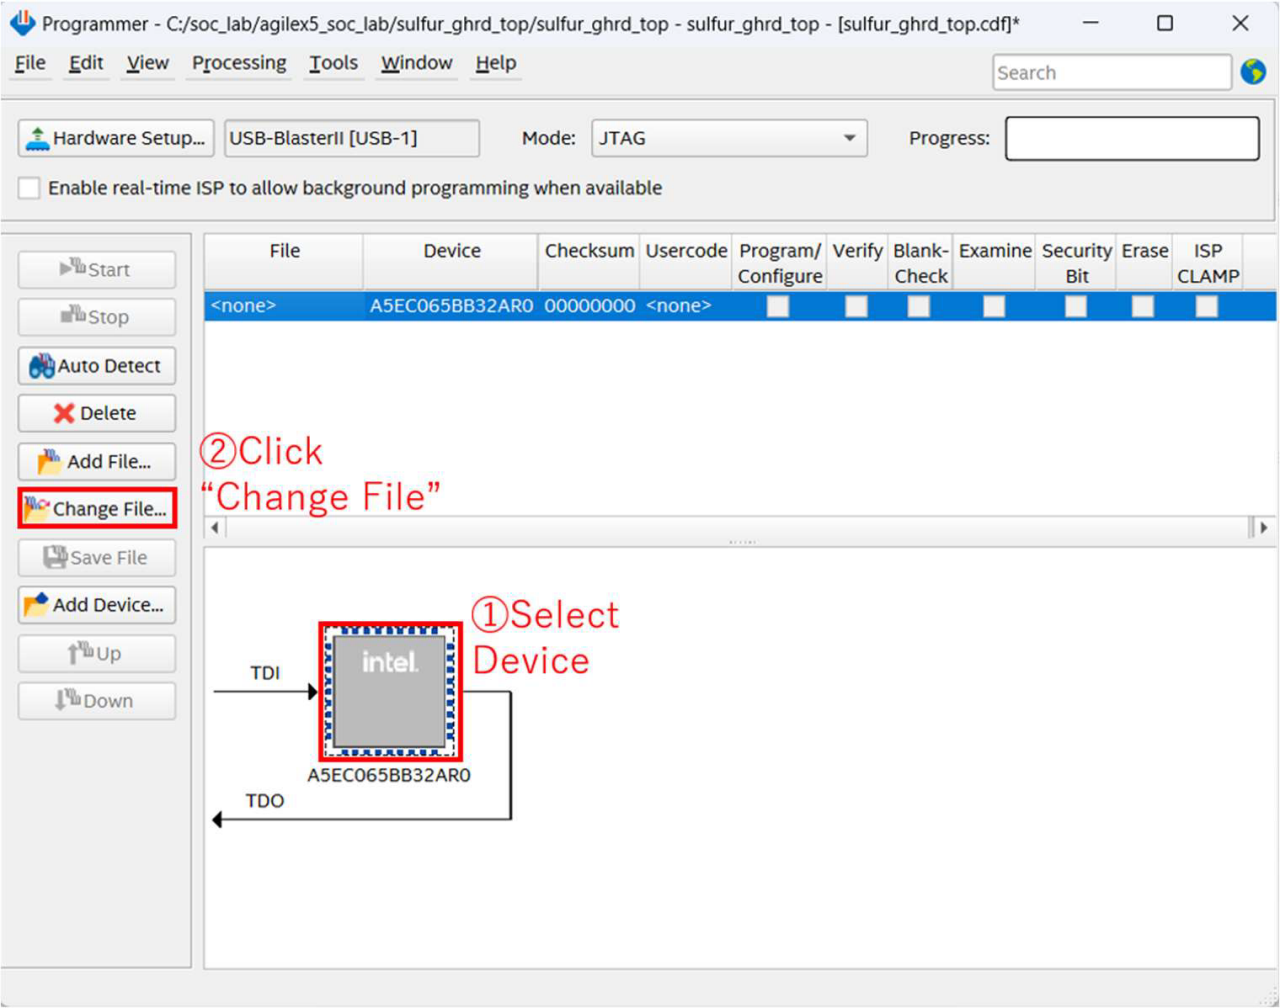
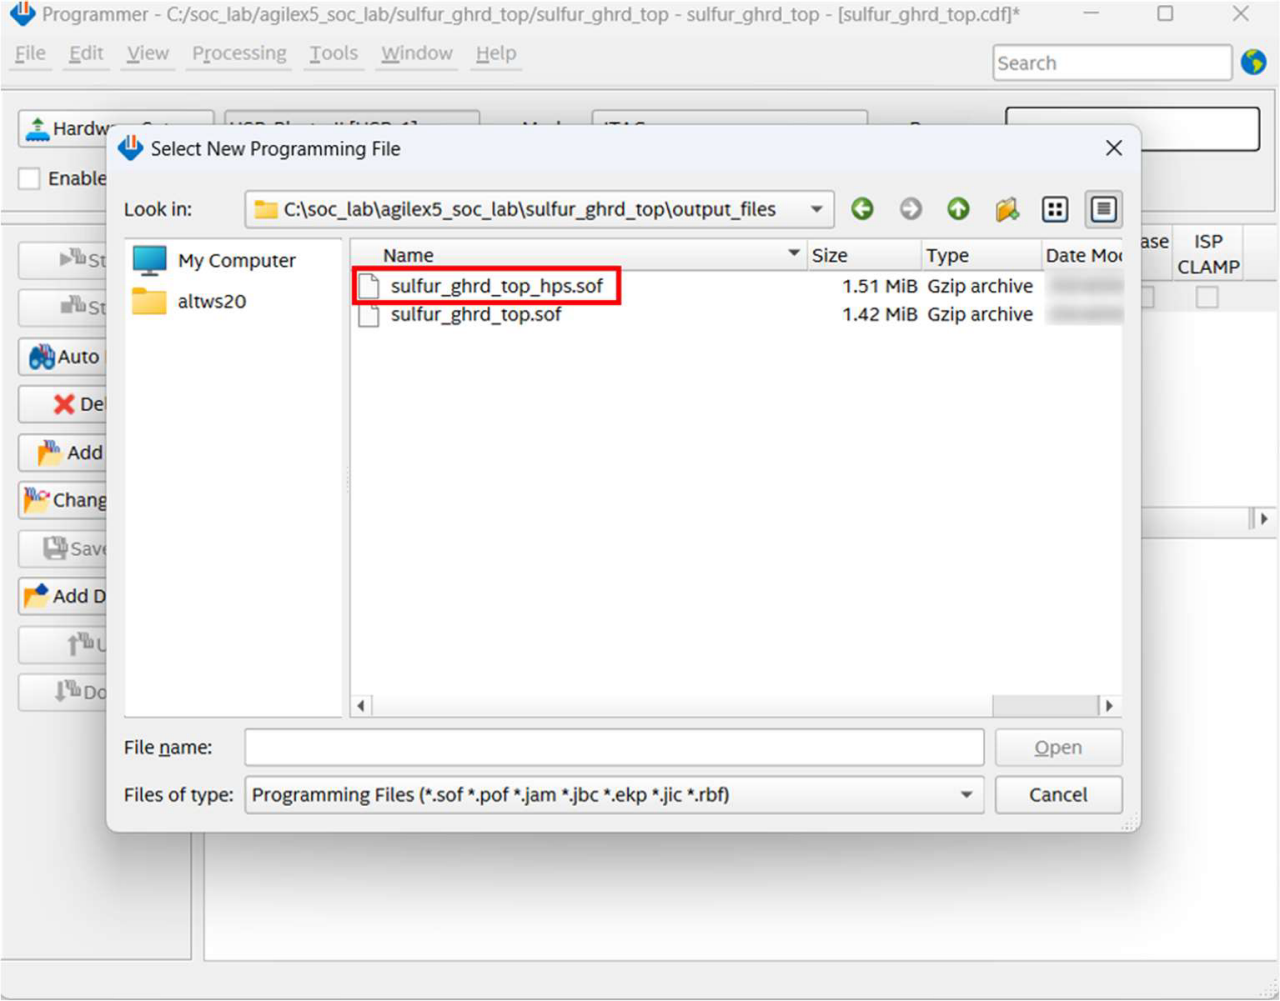
8-3. Prograimming .sof
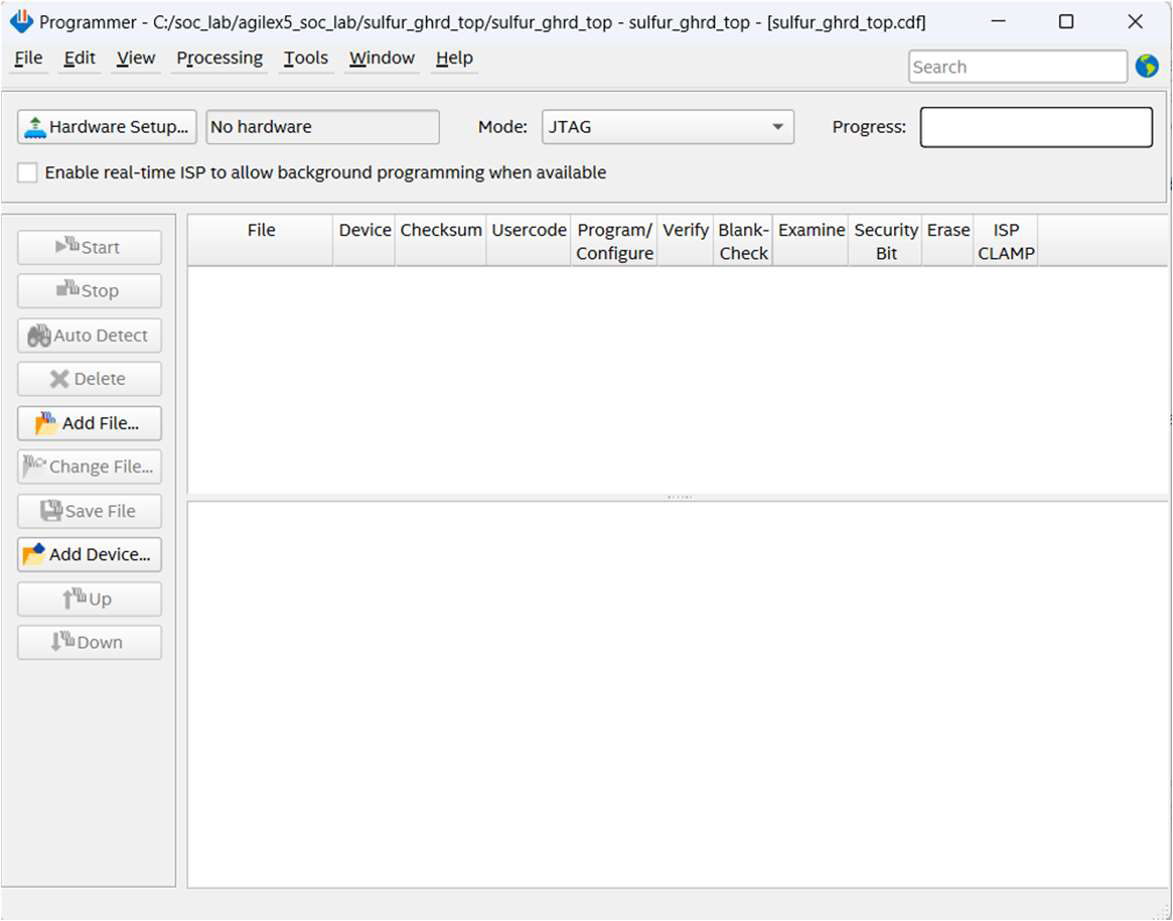
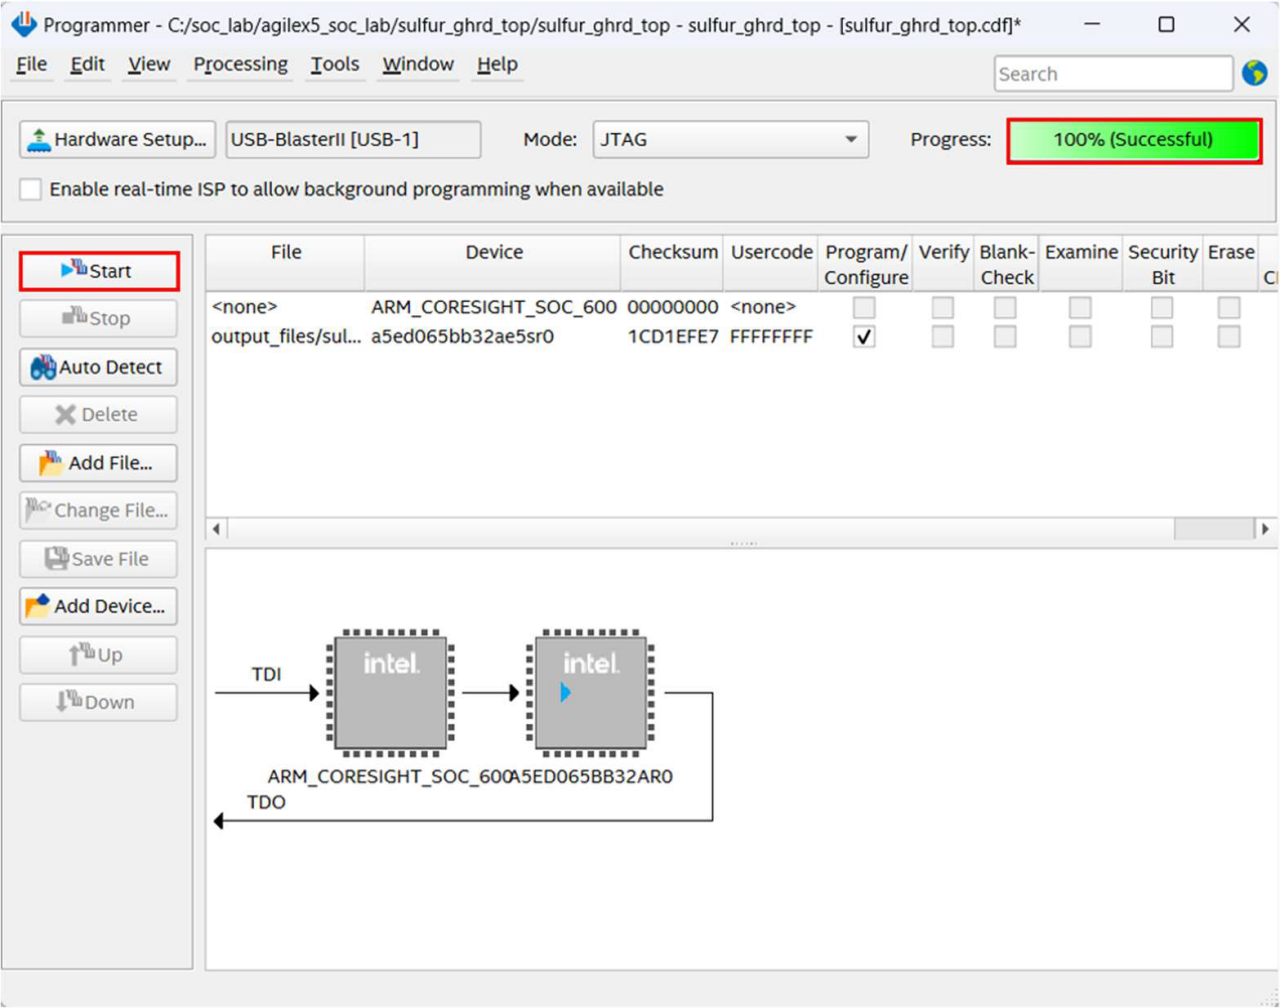
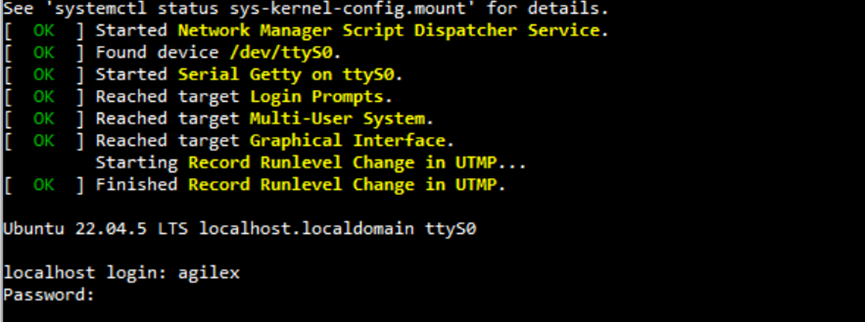
燒錄完畢後,TERA開始執行並顯示以下畫面,這表示已完成並啟動。
參考資料
- https://www.rocketboards.org/foswiki/Documentation/BuildingBootloaderForAgilex5
- https://www.rocketboards.org/foswiki/Documentation/MpressionSulfurDevelopmentKitForIntelAgilexR5FPGAESeries
- https://community.intel.com/t5/Intel-SoC-FPGA-Embedded/Creating-an-SD-Card-for-the-Intel-Agilex-7-SoC/m-p/1576194#M2507
You may also want to know


相關連結
追蹤我們的社群平台!


©Copyright 2025 Macnica Galaxy Inc.